
This blog series is a part of the write-up assignments of my Real-Time Game Rendering class in the Master of Entertainment Arts & Engineering program at University of Utah. The series will focus on C++, Direct3D 11 API and HLSL.
In this post, I will talk about how I added specular lighting to my rendering engine.
Specular Lighting
Below shows how specular lighting works. When an incoming light hit a reflective surface, there will be reflected light. If our view direction happens to align with the reflected light, then we should see the incoming light. Mathematically, this is impossible to happen for a single light source. In real life, what we see on a reflective surface is actually the result of countless incoming lights reflected by that surface. Because it is unrealistic to do calculate the reflected results realistically, we need some estimation of the specular light. This is where the Phong shading and Blinn-Phong shading come in.

Blinn-Phong
I will implement the Blinn-Phong shading model in this post instead of Phong shading. Despite the fact that Phong shading is an efficient approximation of lighting, its specular reflections can break down in certain conditions.
From the image below, we can see that since Phong shading is doing its calculation according to the angle between the reflected light direction and the view direction. If we view the surface from a position with an angle to reflected light larger than 90 degrees, the specular reflections will be nullified.
Blinn-Phong lighting model uses the angle between the surface’s normal and a half-vector which came from the light direction and the view direction. With this modification, the angle theta will never be larger than 90 degrees unless the light is coming from way under the surface so we won’t see the hard cutoff that appears in the Phone model.


Material Properties
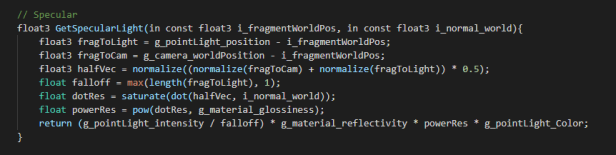
To implement the Blinn-Phong model, I added 2 new more material properties, one is glossiness and one is reflectivity. Glossiness is the power we use in the equation, while reflectivity means the reflected color of that material. For non-metal material, reflectivity will just act like a scalar, but it will be a certain color for metal materials (such as silver and gold). You can see how these properties are used in the actual calculation below. Since specular lighting is additive, and won’t be affected by the material’s inherent color but only the light color and the material’s reflectivity. We will add the result of that function to the color result in the fragment shader.
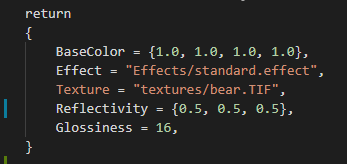
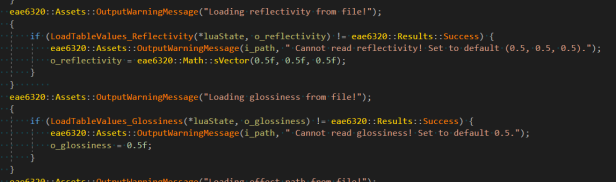
Of course, in order to make our builder pipeline to work. We need to build the material files into binary files from the source and take those new properties into consideration. However, we don’t want to have to go over all the previously made materials and add in the new properties if we don’t have to. Therefore, when building the materials, if the builder cannot find those properties, it will just put in some default values that we specified like below.
Results
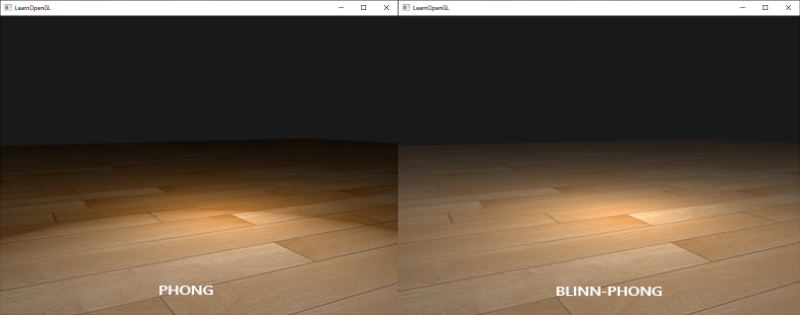
Below shows the result of adding the specular lighting into my scene. You can easily see that it is specular lighting because of the specular highlight and how it moves with the camera position.
Different Materials
Now let’s take a look at how the material properties can affect the appearance of our specular lighting.
High glossiness value, the object looks kind of like plastic
Lower glossiness, but with a blue-ish reflectivity
Lighting Attenuation
We don’t want our lighting to look the same when it is right in front of an object as when it is on the other side of the room. When we think about realistic lighting like a flashlight, we can always see that the surface that we are lighting will be brighter if we hold the flashlight really close, while the lit area will grow bigger but not as bright once we start moving the flashlight away. This is because of the fixed amount of energy generated by the flashlight is being distributed onto different sizes of space.
Using quadratic attenuation with 1.5 intensity
Using linear attenuation with 1.0 intensity
